How to enter data into the GIS Housing and Communal Services: step-by-step instructions for filling out and entering information.
GIS Housing and Communal Services is a new system that centralizes all data about management companies and houses under their management. Due to the newness of the system, it is difficult to use it without using the manual. But what needs to be done to place information on the GIS housing and communal services portal? How to post information on houses?
Dear readers! Our articles talk about typical ways to resolve legal issues, but each case is unique.
If you want to find out how to solve your particular problem, just call, it’s fast and free!
Step-by-step instructions for entering information for local government
Before you start working with the information system, you must register in it. This procedure is free. To do this, you need to be able to use the unified identification and authentication system, and this must be done by the head of the management organization. In order to make it possible to transfer data from the UAIS, housing and communal services, and the Moscow Region to the GIS, it is necessary:
- obtain a simplified account for an individual unified identification and authentication system;
- using its capabilities, create a standard account;
- obtain a confirmed account of an individual;
- register a company in the ESIA;
- add company employees;
- finally, register a legal entity in the State Information System for Housing and Communal Services.
Having received the opportunity to use the GIS portal, the management company must fill out:
- reports on their actions;
- electronic passports for all controlled apartment buildings;
- information from metering devices;
- plans, estimates and reports on expenses aimed at repairing and maintaining the house;
- electronic version of the organization’s financial documentation;
- reporting on work with requests received from residents;
- data on decisions that were made at meetings of residents;
- electronic versions of contracts for the management and supply of resources;
- samples of charters that were adopted;
- other data one way or another related to apartment buildings.
Where to start posting data?
As a matter of priority, in accordance with the norms of federal legislation (Federal Law of July 21, 2014 No. 209-FZ “On the State Information System of Housing and Communal Services”), companies in this area that have registered and gained access to the functions of the system are obliged within 7 days from the date of registration, fill in information about yourself and the houses under their control.
Before the expiration of 15 days from the date of registration, submit documents confirming the process of creating the organization, the procedure for managing it, the number of participants, etc. – all data about the management apparatus of the legal entity.
After the company has undertaken to manage the apartment building, its employees have a week to enter information:
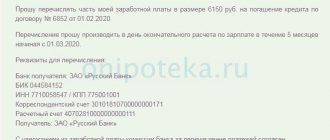
- about who provides the partnership or management company with an account for transferring funds for housing and communal services;
- OGRN;
- code defining the reason for registration;
- BIC;
- account number of the management organization.
Before the expiration of 15 days from the date of assuming responsibility, you will need to enter complete data on the objects managed by the company - residential buildings, the materials from which they were made, and land plots.
How is the official website of GIS Housing and Communal Services useful?
GIS Housing and Communal Services is a general information system in the field of housing and communal services.
This system was created to provide individuals, legal entities, as well as local governments with information related to housing and communal services. Citizens from this system receive information about organizations that manage residential buildings, about the work being carried out, and various types of charges for housing and communal services.
In addition, in the GIS Housing and Communal Services, individuals have the right to create electronic voting in order to express the opinion of all people on some issue. You can send appeals to organizations and control bodies, give meter readings, pay bills and enter into contracts.
Management companies, homeowners associations and utility providers will be able to use the data many times for various types of reports. Thanks to this, consumers and administrative authorities can more easily find mutual understanding. Governing bodies are empowered to make smarter decisions.
The system was developed by the Ministry of Telecom and Mass Communications of the Russian Federation and the Ministry of Construction of the Russian Federation. It allows you to inform people about the state of the housing stock, the work being done and the level of management of general affairs. You can also log into this system using a mobile application.
How to fill out personal accounts?
You can enter this information on the GIS website in two ways:
- manually;
- using a template.
The second method is the most time-efficient and is recommended for use by developers. The template prepared in spreadsheet format, as well as instructions for filling it out, can be downloaded from the participant’s personal account.
The template contains 2 sheets, one of which contains basic information, and the second - data about the premises. On the first sheet you will need to fill out:
- personal account number or any other service user identifier;
- status of the payer (whether he is a tenant or owns the premises);
- total area of the room.
The second sheet contains information about:
- how much percentage of the monthly payment amount the user pays;
- again - his personal account number;
- the address where the residential premises are located;
- his number;
- FIAS residential building code.
The completed template can be easily uploaded to the GIS - using your personal account, find the “Managing organization” section, add all the necessary files using the button, and then import them into the registry.
GIS housing and communal services how to fill out the register of homeowners association members
In 2014, Federal Law No. 209 “On the state information system of housing and communal services” came into force. The law obligated homeowners' associations to enter information into this system in the prescribed manner, and limited the period for connecting to it to January 1, 2020. This is a one-time, but rather long process associated with checks that can take up to a day. The second stage is directly entering data into the system - an initially painstaking and time-consuming operation. All new information must be published in a timely manner to avoid penalties.
We work daily from 6:00 to 20:00 (Moscow time), if you sent a request at another time, a specialist will contact you the next day at 10:00 (Moscow time).
In the submenu that appears, click “Add file” (in the “Download data on apartment buildings” section), then select the file “Import MKD.xlsx” in the “GIS-housing and communal services-export” folder, then click “Upload files” and, finally, “ Import".
In accordance with the requirements of Article 12 of the Federal Law of July 21, 2014 No. 209-FZ “On the State Information System of Housing and Communal Services”, from July 1, 2020, HOAs and other entities managing multi-apartment residential buildings are required to register in the system and begin a full-fledged work in it.
List of works and services
Updating information in the GIS is permitted to authorized employees of the organizations they represent. To implement this function you will need:
- log in to the GIS Housing and Communal Services website and go to the user account;
- find the directory section in the top menu and go to it;
- on the loaded page, select works and services;
- move on to adding services - this can be done either using a standard directory or by adding a completely new job and service. However, if you need to add a standard list of works and services, it is better to use a standard reference book by clicking on the corresponding line;
- in the window that appears, you will need to mark the required work or services and save the changes;
- If the required service is not in the standard list, add it by filling in the required fields and saving the entered data.
To place the resulting list, you need to find the managed house in the registry, go to property management and click on the “Generate list” item. In the window that appears, you will need to save the entered data.
Who is responsible in the company for providing data?
Both company managers and their employees, who are on permanent or temporary staff, are responsible for providing information to the GIS Housing and Communal Services. When entrusting such a task to an employee, management must issue an order, familiarize the subordinate with it, and indicate to him the deadline for completing the work. Ignoring these rules leaves responsibility with the manager.
Read about who is responsible for registering in the GIS Housing and Communal Services, how to work in the system, and what information needs to be entered here.
How to transfer information about compulsory medical insurance?
Compulsory medical insurance specialists also have the opportunity to use GIS after registering an institution with it. After registration you can change:
- information about the institution, if the system displays outdated information;
- employees;
- functions;
- add objects from the Life Fund;
- change the connection of an object with data coming from Rosreestr;
- post data on intra-house networks;
- add entrances;
- change the information available about real estate so that it fully corresponds to reality, etc.
Data entry is carried out through your personal account. Compulsory health insurance employees can change data about the institution itself - everything is corrected online, without requiring the downloading of additional templates.
Similarly, in the corresponding sections, data on housing facilities can be added and changed.
How to correctly fill out the GIS Housing and Communal Services for HOAs
To start working in the system, you need to obtain an electronic digital signature and go through a simple authorization procedure on the portal.
Filling out GIS housing and communal services for HOAs: step-by-step instructions
First, let's look at how to register an HOA in the GIS Housing and Communal Services. After you log into your HOA personal account, in the “Registration of an organization in the GIS Housing and Communal Services” section, the “Information about the organization” tab will open. This is the registration form. And now - a step-by-step algorithm.
- Step 1 . Add the physical and mailing address of the HOA. There is no need to enter it manually; move the cursor over the “≡” button and select your addresses from the list provided. If you made a mistake, click on the “x” button and the field will be cleared. There is no need to specify a time zone. This field will be filled in automatically after the actual address of the organization has been established.
- Step 2. If necessary, fill in the fields “Abbreviated name”, “Date of state registration”, “Official website on the Internet”, “Fax”.
- Step 3. Check the accuracy of the information provided in the fields “Full name”, “OGRN”, “TIN”, “KPP”, “Organizational and legal form”, “Location address”, “E-mail address”, “Telephone”. This data is loaded automatically from the Unified System of Identification and Authentication (USIA) database, so the values of these fields cannot be changed.
- Step 4: Add at least one HOA feature in the Installed Feature Details section.
- Step 5. Enter information about the subject of the Federation in whose territory the HOA operates.
- Step 6: Confirm your agreement to the terms of the User Agreement and click the “Add Feature” button.
It is necessary to post the HOA charter, the protocol where the decision to approve it is registered and enter the date of state registration in the Housing and Communal Information System within 15 days after registering the legal entity or making changes to the constituent documents. The same requirement applies to HOAs to enter other primary data into the GIS Housing and Communal Services: information about the chairman, board members, composition of the audit commission, members of the partnership.
The procedure for working in the GIS Housing and Communal Services for HOAs provides for, after registering the partnership, entering into the system information about managed apartment buildings. This information includes:
- addresses of managed houses;
- technical and other characteristics;
- structural elements - foundation, walls, floors, roofing;
- intra-house networks - gas, energy, heat, water supply and sewerage systems;
- current condition, including percentage of total wear.
Let's look at how an HOA can add a house to the GIS Housing and Communal Services.
- Step 1 . Log in to your HOA personal account and select the “Housing Objects” command in the “Management Objects” menu. Then click the “Add house” button on the “Register of housing stock” page.
- Step 2. Enter the required data on the “Specify the site address” page and click the “Next” button.
- Step 3 . Fill out all required fields on the “Add a Home” page and click the “Post Information” button. If necessary, enter data about entrances, residential and non-residential premises.
- Step 4. Enter the number of floors of the house, including underground, based on the data from the cadastral passport of the apartment building.
- Step 5. Click the select button to fill in the “OKTMO Code” field.
- Step 6. Click the “Post Information” button to enter information about the house into the Housing and Communal Services GIS.
- Step 7. Click the “Select information from Housing and Communal Services Reform” button to fill in the house information automatically.
The last step is only advisable if you are sure that the information about your homes is contained in the appropriate database.
Next, using a similar algorithm, information about all residential and non-residential premises located in the apartment building is entered. For non-residential premises, it is necessary to indicate their purpose, which is given in the cadastral passport of the property.
Useful video
Watch the video instructions:
Infocraft: Housing and communal services formula.
Assistant for filling out data on accounting objects for GIS housing and communal services picture_as_pdf
The processing “Data Filling Assistant for GIS Housing and Communal Services” is designed for conveniently filling out the characteristics of accounting objects in the database. Subsequently, these characteristics are uploaded to the GIS Housing and Communal Services into Excel file templates through the processing “Downloading data for import into the GIS Housing and Communal Services”.
Processing is located in the menu item “Information Disclosure” - “Integration with GIS Housing and Communal Services” - “Assistant for filling out data on accounting objects for GIS Housing and Communal Services”.
When using this assistant, you must specify the date of completion, it is on this date that the changes made below will be recorded in the database, select the organization and type of organization.
Using the “Settings” button, you should indicate the correspondence of the characteristics of accounting objects, if such a correspondence was not made when uploading data for import of GIS housing and communal services, because These settings are inherited from this download.
First, you need to match the characteristics that are already filled in the database. For example, if a building already has a value for the “Total Area” characteristic, then it needs to be compared. After the characteristics are matched in all tabs, click the “Create all characteristics” button. In this case, empty fields will be filled with default characteristics. After all actions, you must save the characteristics by clicking the “Save characteristics” button.
An important point is that buildings must indicate the building type (Residential building/Apartment building). If values for these characteristics were not specified previously, the program will inform you that in order to continue working, you must specify the appropriate type for all buildings.
When you use the “Show all buildings” button, all buildings entered in the program will appear in the “Building” tabular section. Otherwise, only those buildings for which the type is not filled will be displayed.
To set the same type value for the list of buildings, so as not to manually select a value in the “Building Type” column in each line, you can select the required list of buildings, for example, by pressing the “Ctrl + A” key combination; you can also select the list by holding down the “Shift” key or "Ctrl" Next, click the “Change Selected” button, in the “Select a characteristic value” window that appears, select the required value in the “Value” field and click “OK”.
To proceed to editing characteristics, you need to click the “Save changes” button. If everything is filled out correctly, an information window will appear on the right, where it will be indicated that “The document was posted: Group change in the characteristics of accounting objects ... from ...”. Then click the “Proceed to editing characteristics” button.
A window will appear with many tabs on which you can edit the characteristic values.
It is worth noting that there are mandatory characteristics to fill out, they are marked in green on the form, and there are also optional characteristics - in yellow. The list of required fields depends on the type of organization (UO/OMS/RSO/HOA/ZhK/ZhSK) and is determined by the GIS Housing and Communal Services portal. If you need to fill out only mandatory characteristics, then on the previous assistant form you can set the “Display only mandatory characteristics” flag. Otherwise, all characteristics will be displayed.
Selecting the “Display deregistered objects” flag will add all objects, both accepted for registration and deregistered, to the list of housing stock objects.
Setting the flag “Display only objects that do not have mandatory characteristics filled in” serves for selection by residential objects and makes it easier to work with individual residential objects.
Let's look at editing characteristics using the “Buildings” tab as an example.
When opening the form, the characteristics values already existing in the database on the date specified in the processing are entered into it.
For the convenience of working with lists of accounting objects, the ability to set a selection has been added on each tab (the filter can be set by building type, locality, street, building).
The tabular part indicates the values for the required characteristics. If you need to specify one value for several objects, then you can select a list of these objects and then click the “Edit Selected” button. In the “Select characteristic value” window that appears, fill in the “Value” field.
You can similarly fill in the information on the remaining tabs.
If a selection is made by building on the first tab:
This selection will extend to other tabs:
After all the necessary changes have been made, click the “Save Changes” button. If everything is filled out correctly, an information window will appear on the right, where it will be indicated that “The document was posted: Group change in the characteristics of accounting objects ... from ...”.
If you close the form without recording your changes, the program will offer to save them.
The “Personal Accounts” tab displays personal accounts in accordance with the selection. To upload information to the GIS Housing and Communal Services, the column “Invoice for payment for premises and utilities” must be set to “Yes”.
In the column “Account for payment for major repairs” the value is set to “Yes” if an accrual for major repairs is made within the framework of this personal account.
If personal accounts have already been uploaded to the GIS Housing and Communal Services and the ELS export file has been loaded from the Housing and Communal Services GIS, then these values will be displayed in the columns “Single personal account”, “Housing and communal services identifier” and “Housing and communal services identifier for major repairs”.
GIS Housing and Communal Services: entering information about HOAs, housing cooperatives and housing complexes.
The principle of filling out information about the report of HOAs, housing cooperatives and housing complexes is not very different from what was used to fill out information in the Housing and Communal Services Reform. Not only the content is similar, but also the form of the fields - we are talking about form 1.2. As for the frequency of posting information, this should be done every year, in the first quarter.
Detailed step-by-step instructions
There are the following stages of registration in the GIS housing and communal services system::
- Obtaining a qualified electronic signature key (CES).
- Registration in the Unified Identification and Authentication System (USIA).
- Registration on the GIS housing and communal services portal.
Obtaining an electronic signature
The first step is to perform additional actions, or rather, obtain a digital signature. The presence of this signature allows you to use the system and transmit information about yourself in full, and most importantly, to certify it.
An electronic signature is an analogue of the real signature of the head of the company. This signature is necessary to accompany various operations and actions, including those related to the GIS housing and communal services. To obtain a signature, you need to contact an accredited certification center located in your city. To find out the list of these centers, it is worth visiting the websites of GIS Housing and Public Utilities and the Ministry of Telecom and Mass Communications.
The process of obtaining an electronic signature comes down to the following steps::
- Go to the website www.pki.gov.kz.
- When submitting an application online, a window will appear with the message “Please wait, the request is being processed.” At this time, the software on the computer is checked. As soon as the verification is completed, the user will receive a notification about the successful verification.
- Select the type of person: natural or legal.
- Indicate the Individual Identification Number in the “TIN” field.
- After entering the IIN, all data is automatically checked in the database, and they are also filled in automatically.
- In the next window, indicate sequentially the region, city and address of the public service center.
- Select one of the types of devices where the private key will be generated.
- Now you can check the information provided and send the completed application to the selected Registration Center of the NCA RK.
- If all data is entered correctly, click on the “Submit Application” button.
- The application number will appear in the next window. Remember it, it is needed to identify the submitted application to the Public Service Center. Save and print the application.
- As soon as your application is confirmed by the operator in the Registration Center, a notification about the successful issue of certificates and a link for installing them on your computer will be sent to your email.
To obtain an electronic signature, an individual or legal entity must provide a list of documentation:
- passport of the head of the management company (original or copy of 2-3 pages, certified by a notary);
- OGRN certificate (original or copy certified by a notary);
- constituent documentation (charter/memorandum of association – original or copy certified by a notary);
- TIN (original or copy certified by a notary);
- SNILS (original or notarized copy);
- application for certificate issue;
- an extract from the Unified State Register of Legal Entities (original or copy) with the seal of the Federal Tax Service Inspectorate and the signature of an employee of the department with a description of the name and position held.
Registration on the State Services website
To register on the official portal of the GIS Housing and Communal Services, you must create an account on State Services. To register you need to follow the following procedure :
- Go to the website https://www.gosuslugi.ru/.
- Click on the “register” button.
- After clicking, a link to the password registration page opens.
- On the page that opens, enter your full name, mobile phone number or email address.
- After clicking on the “register” button, you will receive a link to the password registration page.
- On the page that opens, enter SNILS and the details of your identity document (Passport of a citizen of the Russian Federation, for foreign citizens - a document of a foreign state). The entered information is checked by the Federal Migration Service of the Russian Federation and the Pension Fund. A notification of the results of the verification will be sent by email.
- To register a Verified Account with full access to all electronic government services, you need to verify your identity using one of the following options:
- contact the Service Center;
- receive an identity verification code by mail;
- use an Enhanced Qualified Electronic Signature or a Universal Electronic Card (UEC).
Registration in GIS Housing and Communal Services
In order to register in the GIS Housing and Communal Services, you must follow the following instructions:
- Go to the website https://dom.gosuslugi.ru.
- Click on the “Register” button.
- A page opens on which information will be written that in order to register for the GIS Housing and Public Utilities, the user must have an account with State Services.
- In order for a legal entity to log into the official website of the GIS Housing and Communal Services, it is worth using the same registration data that was created on State Services (mobile phone number and password). After that, click “login”.
- The user will receive a security message. It will ask for the user's consent to work via secure channels. After this, you can safely click “Continue”.
- As soon as authorization has been completed in the “Data about the organization” section, the “Registration of an organization in the Housing and Communal Services GIS” form will become available.
- The user’s personal information is automatically downloaded from the State Services profile. Here you need to check the box next to “I accept” and click “Login”. Information about the organization listed on the State Services website is also downloaded automatically. You need to fill in the blanks. This job will take approximately 30 minutes.
More nuances about how a legal entity is registered in the State Information System for Housing and Communal Services, as well as all the features of the procedure are described in another publication.
What is included in the report data?
GIS housing and communal services should accept from users not only reports on the activities of these organizations, but also financial statements. It is formed over a year, the form is free, so there are no special rules for drawing it up. It will be possible to upload it into the system only after the document has been certified by the seals of the organizations. On the other hand, there are still mandatory items in the annual financial statements:
- First of all, you will need to disclose a balance sheet and a report on the intended use of funds, an estimate of expenses and income, and a report on its implementation.
- All contributions received to the account are disclosed in detail, including membership, targeted and voluntary contributions. You must also indicate the profit received from the organization’s activities.
- It is necessary to explain how the funds received were used. This could be wages, charitable donations, repair expenses, business trips, etc.
Entering information into the system
As in other cases of data transfer to the system, you cannot do without authorization. As soon as the user enters the site, he will need to select Management Objects in his personal account, and then click on Information Disclosure. The item is at the very bottom of the list.
Once the dialog box opens, the user will need to click Edit. This is if we are talking about adding new information, but if you want to find a HOA report that is already in the system, then you will need to click the Find button.
If you do not need to fill out the first tab, then fill out the tab called Main Indicators.
All fields marked in red must be filled out. This list includes a statement of financial results, an appendix to the balance sheet, the balance sheet itself and an appendix to the first report. When generating a report on your work computer, regardless of whether it is a report from an HOA, a housing cooperative or a residential complex, the document always needs to be certified. Without this, there is no point in uploading the document to the system, as it simply will not be accepted. For additional information, there is an Add information button.
Additional information includes statements of cash flows and changes in equity. It is very important not to forget to save your changes.
Step-by-step guide on how to register your organization on the site
WE connect to your program the external module “Management of GIS Housing and Communal Services”, which takes care of uploading data to GIS Housing and Communal Services.
If there are several personal accounts within one premises, you will need to indicate each of them when loading them.
They are entered through the “Management Objects” menu. When filling out, it is necessary to indicate indicators of the quality of services, the planned volume and mode of supply, housing facilities to which the resource is supplied, service consumption standards and data on current tariffs.
The textbook “Placing Information on Payment Documents” has been written about the important and problematic section “Payment Documents” to fill out. You will learn how to:
- post data;
- calculate the amount of fees and make recalculations;
- work with the “Reference Information” tab;
- post accruals.
There is a corresponding appendix to the document, which indicates the nature of the data entered into the database and the organizations that need to do this. The obligation to fill out the GIS exists not only for private companies, but also for municipal departments, ministries and resource supply organizations.
All information for homeowners must be entered on the web resource in a timely manner, otherwise a fine of 200 thousand rubles will be imposed. They are uploaded to the page at different times.
If everything is done correctly, then when you enter the GIS Housing and Communal Services, a menu will be displayed that contains, among others, the items “Administration” (for the system administrator), “Management Objects,” “Result of file import/export” (note: the last item is usually displayed when selecting the “menu” symbol at the end of the site menu).
Federal Law of July 21, 2014 “209-FZ “On the State Information System of Housing and Communal Services” provides for fines for failure to fill out the GIS Housing and Communal Services for HOAs and other legal entities managing multi-apartment residential buildings.
Each instruction is accompanied by a mini-test (for example, in the test on metering devices there are only two questions), however, the textbook does not provide the keys, so in the end you will be left in the dark whether you have mastered the topic or not. All materials are detailed and include screenshots.
This section must be completed if the capital repair fund is formed in a special account. You should fill out the “Register of Accounts” and “Register of Information on Major Repairs” tabs.
Check the accuracy of the information provided in the fields “Full name”, “OGRN”, “TIN”, “KPP”, “Organizational and legal form”, “Location address”, “E-mail address”, “Telephone”.
Information for the cooperative
Organizations must upload not only their estimate, but also a report on its implementation. The field below is highlighted for this purpose. The procedure is as follows: first of all, you need to upload electronic images of documents, then click the Save button, and only then - Post.
It is very important for management companies to monitor which version of the GIS housing and communal services system is currently in use. The fact is that it is updated quite often, so some instructions may become outdated. At the same time, filling out the GIS Housing and Communal Services will still remain a mandatory procedure.
Some employees of management companies encounter various problems when loading data into the Housing and Communal Services GIS; instructions for filling them out will therefore be very helpful here. So follow our advice, and you will fill out the housing and communal services GIS correctly, protect yourself from mistakes and save time on edits. How to correctly upload data to GISZHKH First of all, it is worth checking how accounting objects are filled out: buildings, premises, personal accounts, service contracts. 1. In 1C, this is as easy as shelling pears: click the check button. In other accounting systems, create an upload template, open it and make sure that the required fields are filled in. The easiest way is to check the OKTMO field; the values in the template field and GISZHKKH must match. 2. Do not upload unverified data, otherwise you risk getting bogged down in the routine of fixing errors. 3. Do not upload cadastral numbers. Rosreestr sometimes lies, there are also people working there who make mistakes. First, check the data of Rosreestr and GISZHKH. In our practice, there were various cases when the State Housing and Public Utilities Service complained about the difference in the total area of the house and the sum of the areas of unloaded premises. The area of the house in Rosreestr once turned out to be 78092 instead of 7890.2 and required an additional 71,000 square meters of premises. 4. After you make sure that the template is filled out correctly, upload the template to GISZKKH, in response you will receive codes for issuing compliance with GISZKKH and the accounting system. Upload them to your accounting system. Alternative way: entrust the unloading to our specialists, we will check and publish it on GISZHKKH. You can leave a request here. If you use 1C accounting in management companies, you can connect to our online service. After compliance is established, we upload data according to the list: 1 Constituent documents, registration on the GIS Housing and Communal Services (license) 2 General information about the company (working hours, reception hours) 3 Payment details 4 Management agreements for apartment buildings 5 Register of HOA members 6 Information about apartment buildings (information about premises, entrances, technical data) 7 Information about personal accounts (including personal data) 8 Utilities under a management agreement 9 Metering devices (general and individual) 10 Correspondence between services between the management company and the GIS Housing and Communal Services 11 Payment documents for the current and previous periods 12 Payments 13 Voting register 14 Annual reporting (general) 15 House management reports 16 Technical passport (structural elements, internal elements, elevators) 17 Acknowledgment (carrying out) 18 Data on major repairs (see major repairs) 19 Directory of works and services 20 List of works and services (for each house) 21 Plan of work and services (in volume and money, for each) 22 Actual work performed (in volume and amount for each house) 23 Information on the status of payments 24 Information on the quality and quantity of utilities 25 Use agreements common property